So, the kitchen. Many of you have weighed in as I've bounced around different thoughts and plans. I've swung from wanting to do a full-blown-knock-down-tear-out kitchen remodel to "let's just leave it all as-is for another year or two and then renovate" - and every version of a remodel in between.

One of the first things I try to figure out about a new client before we start working together is their change tolerance. Some people need more time on decisions, some people move very, very quickly. Usually somewhere in between yields the best results. Unfortunately, I swing a little more on the side of "very quick" decision maker when it comes to my own house choices, which comes back to bite me sometimes. I've been trying to learn how to slow down and pace my decisions, but I am super comfortable with change. I'd love to move to a new house every year if I could! Or at least I'd love have a new kitchen every year if it wasn't so expensive and wasteful! :)
Anyway, what I'm getting at is that I spent a little more time thinking about what I wanted to do in this kitchen than I might normally spend, and I still waffled right up to the very end on how much money and effort we should put in here. This room is a head-scratcher for me. It really, really bothered me how much I didn't like the room we spent a huge amount of time in every day. But I think we've finally figured out a longer-term plan that makes sense for the house and for us.
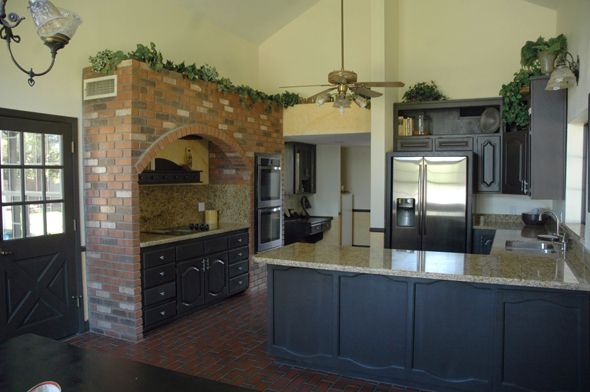
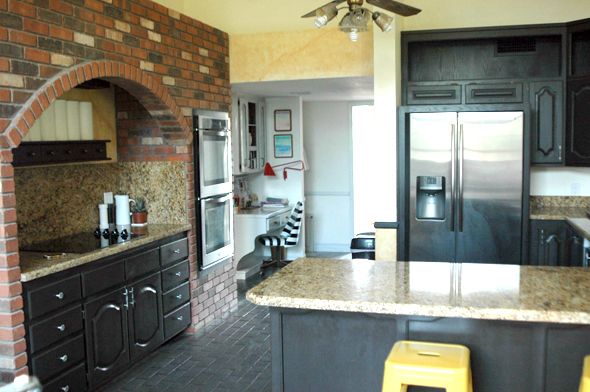
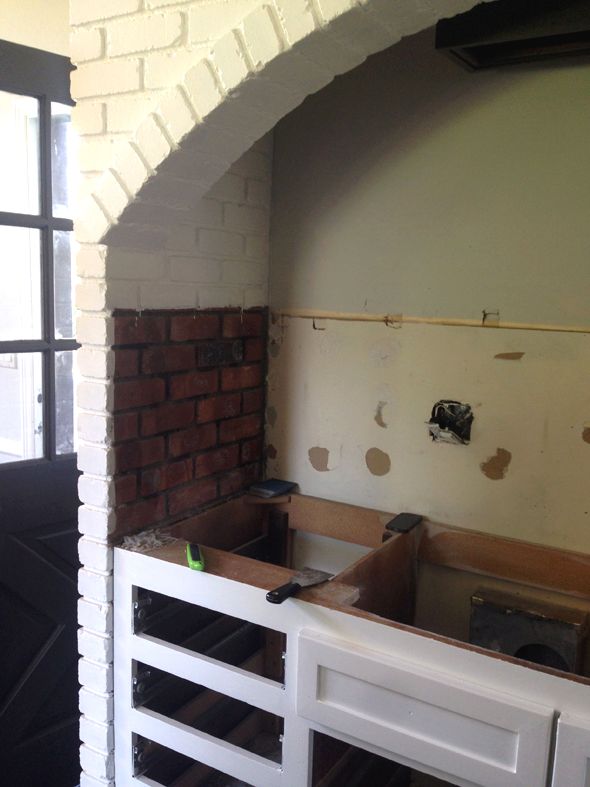
I'm sure you remember that we're going to need a new roof here in the next year or two. The roof (which is going to cost a ton) is higher priority than a fully brand new, re-worked kitchen. So we decided to spend the next 1-3 years putting our pennies away for a new roof and a new kitchen. And in the meantime, we'd do a Jenny style make-it-work remodel in the kitchen. Because of the photo shoot, I can't show you one or two angles, but I want to share a lot of the process with you over the course of a couple posts. We're about 90% done now and I can't believe how new the room feels! And it also feels bigger! A huge part of the change was removing the granite.
I really tried guys. I wanted to make this work, but it was a doomed relationship from the start. It's not you, Granite! It was me all along.

Slowly and carefully we scored and pried, and the granite was removed. The cut out parts by the sink and cooktop ended up snapping, but all the other lengths were successfully salvaged and are being reworked for another family's bathrooms.
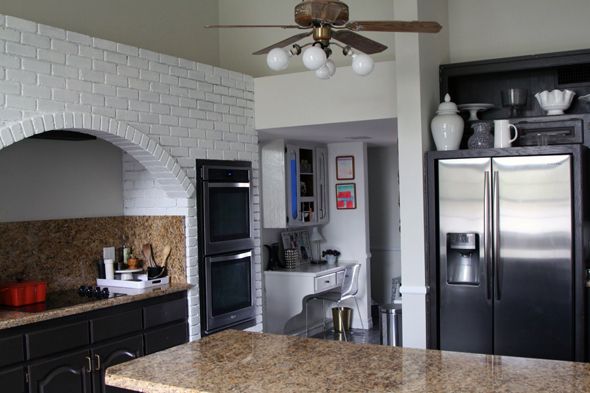
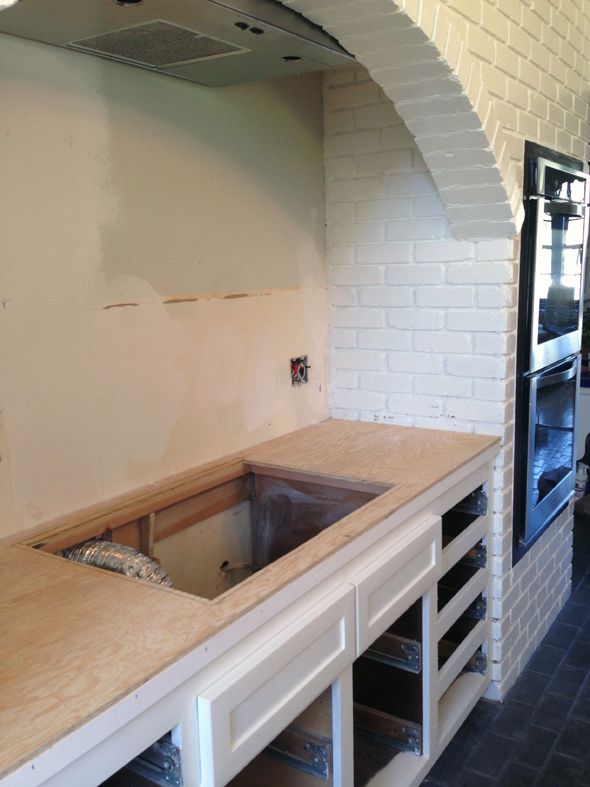
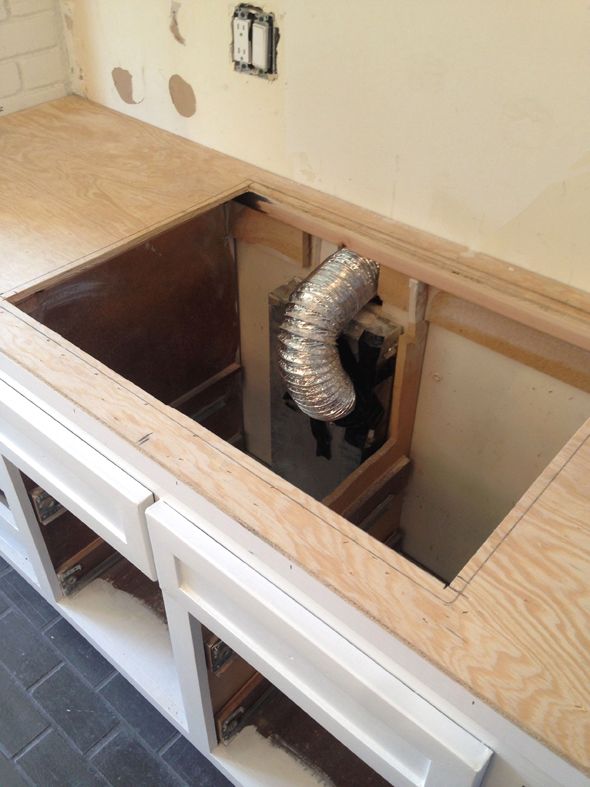
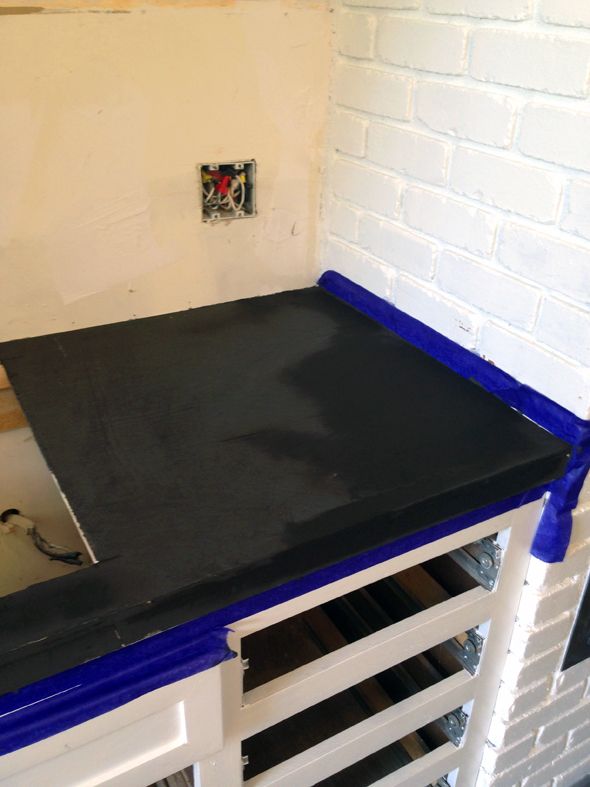
And we used plywood to build countertop bases for concrete. I was really tempted to go with stone, but it was a pretty obvious choice to go with the concrete overlay. It looks great and it's CHEAP. Like less than $100 for all the materials required here (concrete, plywood, concrete color additive). Actually scratch that. The sealer I bought this time was about $100 alone, but it was worth the splurge. It's really good and it's food-safe, which is so important for a kitchen space, obviously. I'm totally getting ahead of myself though. More on concrete later.
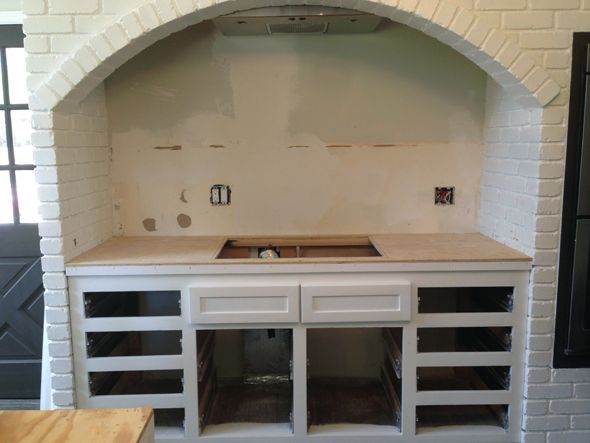
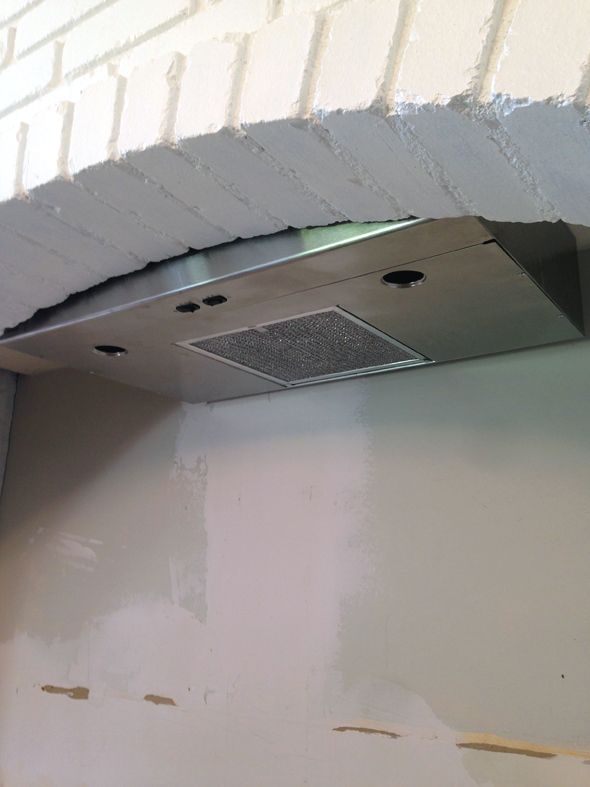
After removing the granite, it seemed like a good time to have our handyman install a vent hood. There had been a downdraft vent at one point, so we just had to open up the drywall and connect the new overhead hood with the existing vent to the outside. It was so simple and I have been SO HAPPY to cook lately. :) No ventilation is bad, bad news, guys!
I wish the hood didn't show at all, but we only had a couple of inches to work with (the HVAC vents are right above this, so we couldn't get any more height - grrr) and this was the thinnest vent we could find for the money. It's worked out though - we ended up running concrete all the way up the back wall, so now it's a lot less noticeable. I'd rather have an inch or two of hood visible than no hood at all I guess.
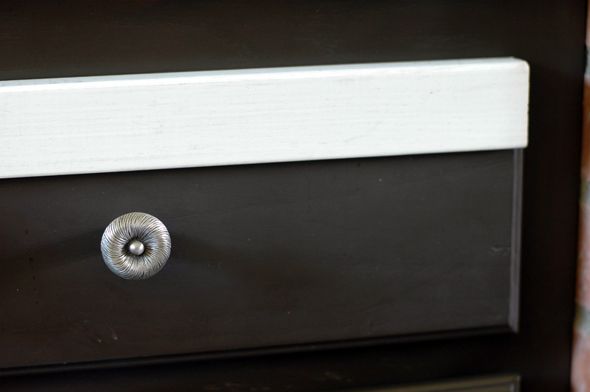
You probably noticed the color change on the cabinets here. This is the primer coat, so it's brighter than the final color (Ben Moore's Swiss Coffee). We wanted to go with a really warm white to balance out the cool wall color (Titanium). The floors are probably going to get a change too. We had a few drips and spills while doing the cabinet frames and the concrete so we need to do touch ups anyway. Might as well go a little lighter.

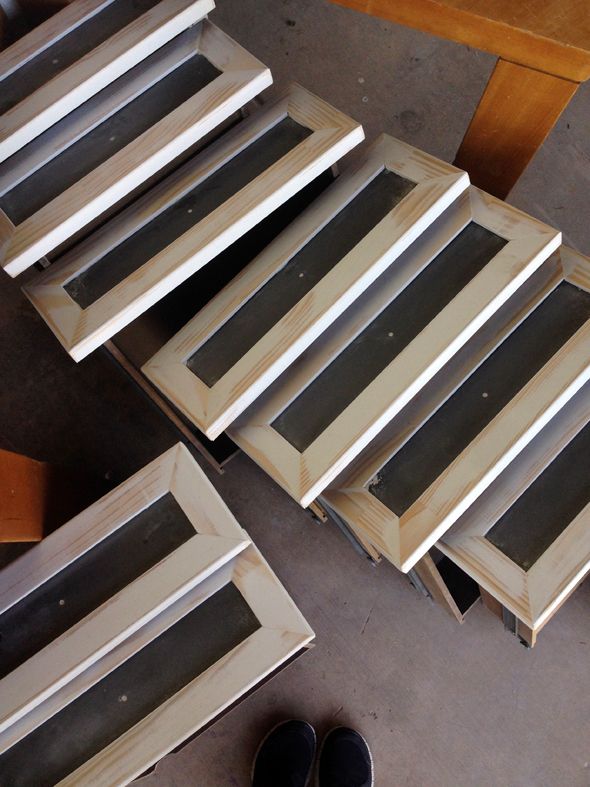
The cabinets were updated with some L-shaped corner moulding, cut with my miter saw and installed with a really cheap pinner gun I got on clearance at Lowes. It took a full day to get just the moulding on (sooooo many cuts), but I love the cleaner look of the shaker style fronts. We saved a ton of money by going this route and salvaging the cabinet doors, drawers and frames, so it ended up being worth the effort.
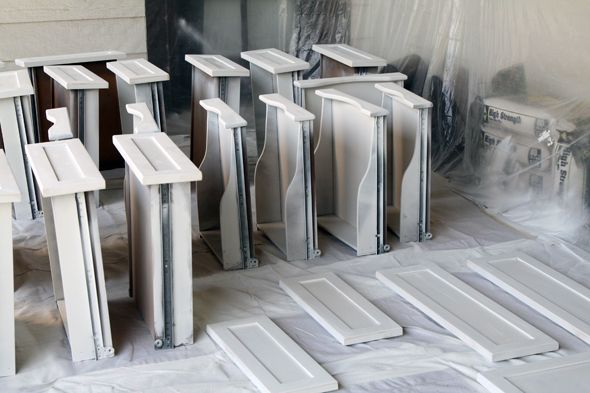
I bought a new spray gun with a wider spray radius than the Critter. I will defend my undying love for the Critter til the day I die, but it does spray a little slower and finer than the bigger guns. I found this Grace airless sprayer at Lowes on clearance (they have the BEST deals on clearance tools!) and it's been pretty great. The airless feature means you don't need an air compressor. You just plug it in, fill the cup with paint and start spraying. I'm really happy with how fast it sprays and how smooth the finish is. This is the primer coat below, after we had sanded and caulked the new moulding.
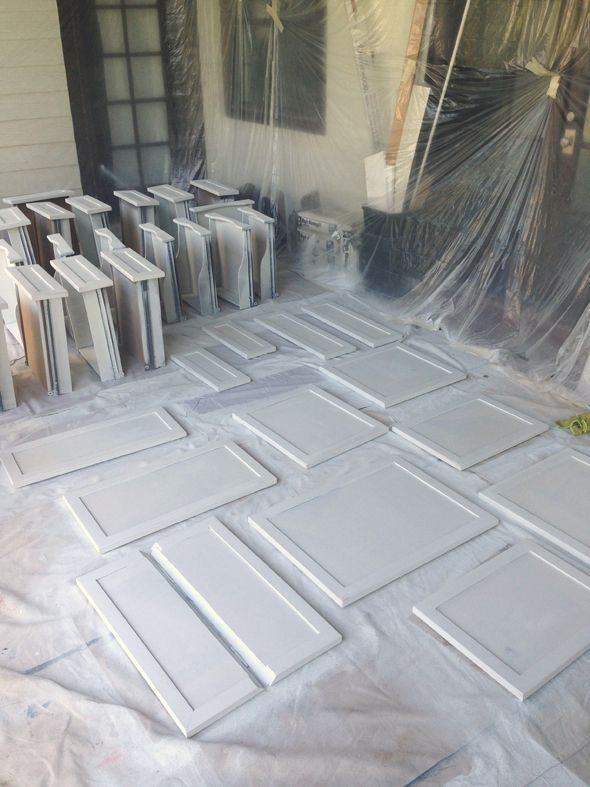
After taking these photos, I sprayed a second coat and covered the drawer sides and glides on that pass, so everything is white now. It is such a clean look.
The cabinet frames are not the best, but they function and now they're much prettier. I'm waiting for the hardware still and I'll show some afters soon and talk more about the counters. We went with black and I'm pretty much in heaven with the combo of the dark counters and the creamy white cabs. Good stuff.
I'm so happy we decided to just make the big stuff work for another year or two. To me, a few days of hard labor and a couple hundred bucks are work it to have a prettier kitchen, even if it is just a temporary fix.
0 comments :
Post a Comment