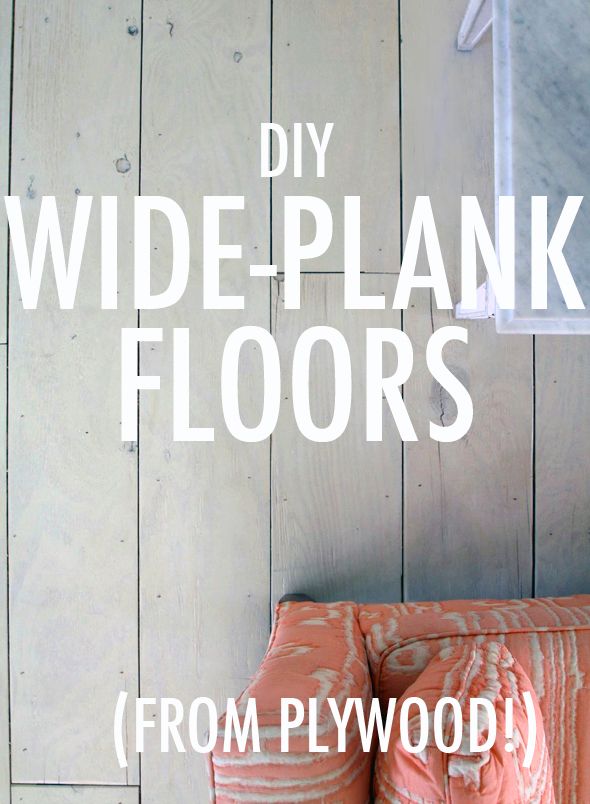
Then I did the thing that I sometimes do, where I'm convinced I just invented some incredible new DIY and then I google the idea and there are already a dozen tutorials up on the interwebs for my idea that felt so original and unique only five seconds before! (Sadness ensues). Seriously though, are there any new ideas in the universe? Maybe one day I will finally come up with something revolutionary, but for today, here's my version of plywood wide-plank floors.
So there's this really cool event space in Manhattan called Gary's Loft that companies love to host parties at. One of the spaces is big and open and all white, with gorgeous, gappy wide-plank white wood floors. I loved going to parties at Gary's.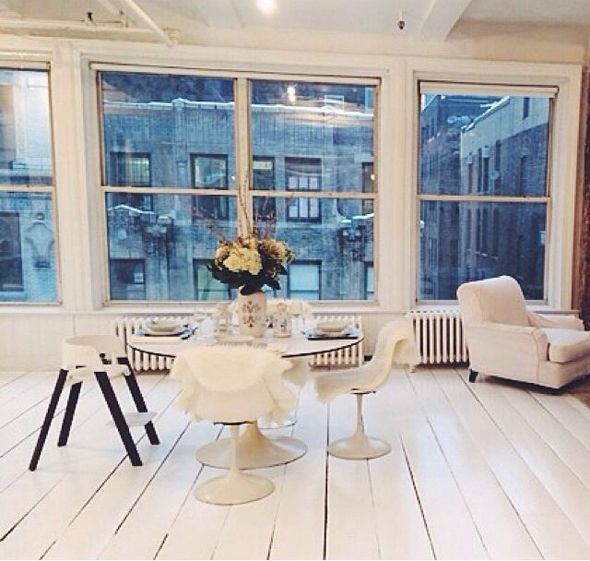
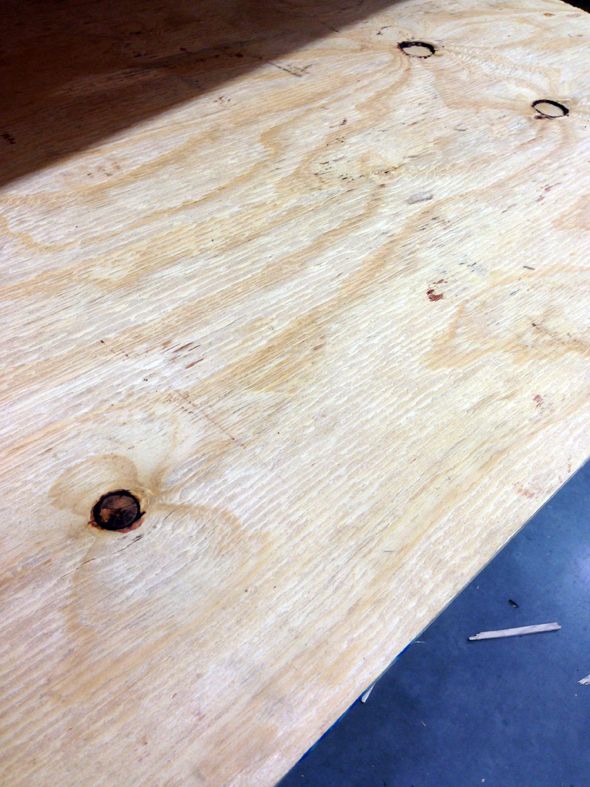
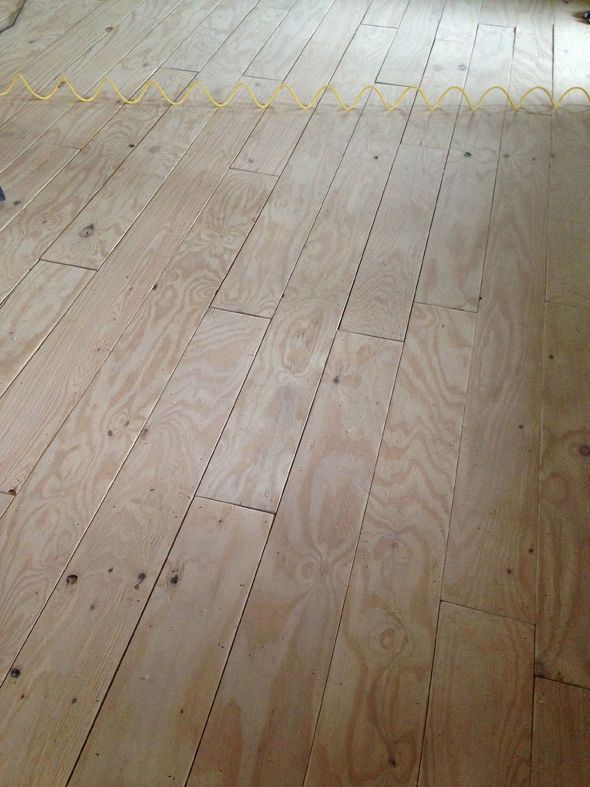
When I was planning my approach to the DIY, I had those gorgeous floors in mind. They were perfectly imperfect and all worn and full of character. I had the thought that cutting down and using plywood as the planks could achieve a similar, and even more rustic (in a good way) look. So I headed to the lumber section at my local Home Depot and found just the right plywood. It's almost a half-inch thick and one side is more finished than the other.
Plywood sheets are 4x8', which is 32 square feet. We needed to install about 800 square feet of flooring up in the studio space with the attached bedroom and balcony. Which meant we needed about 25 sheets of plywood. At less than $18 per sheet, my price per square foot came in at about 50 cents, which is complete insanity!

So, I found the plywood I wanted, took a photo of the price tag, and walked up to the customer service desk. I placed an order for 25 sheets and I asked for each sheet to be cut down into 8" planks, lengthwise (which meant there was no waste - exactly six planks from each sheet). I'll admit that I did get a few funny looks, but for the most part everyone at Home Depot was incredibly nice and accomodating, given the huge ask. I was more than prepared to pay 10 or even 25 cents per cut, like one of the guys in the lumber department suggested they might charge me at the order desk. I think I paid for cuts when I did the wall planking project in our mudroom, but this time there was no charge for all those cuts! I'm pretty sure it was because I was really flexible on timing and let them take as long as they wanted to get the order finished. And even then, it was less than 24 hours before they called to tell me my planks were ready to be picked up.
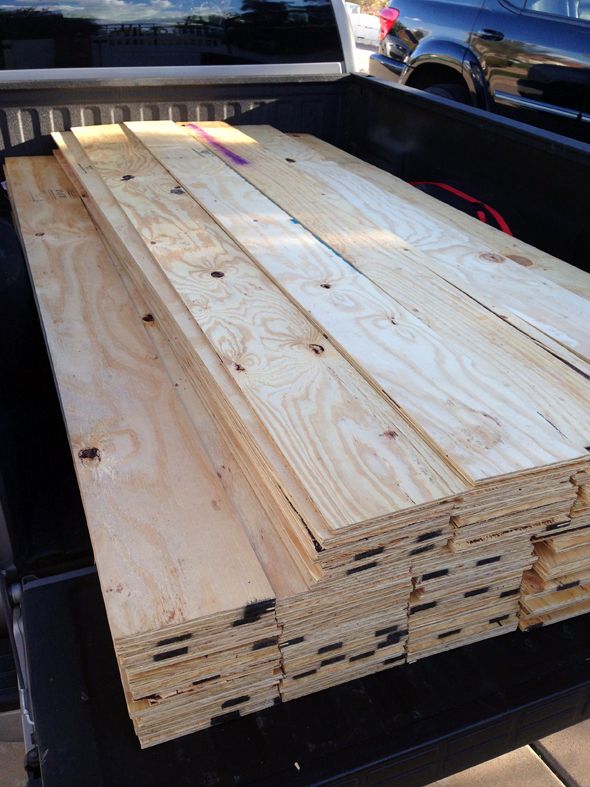
We borrowed a truck from my kind brother in law and he and the Home Depot guys helped us load up the 25 sheets of cut wood. The tricky part was then getting all the wood upstairs! These amazing gloves practically never left my hands during the two or so days I was installing the planks and moving them around. The gloves are thin, but really durable and they grip so well that you almost forget you're wearing gloves at all. They're my favorite brand I've used so far.
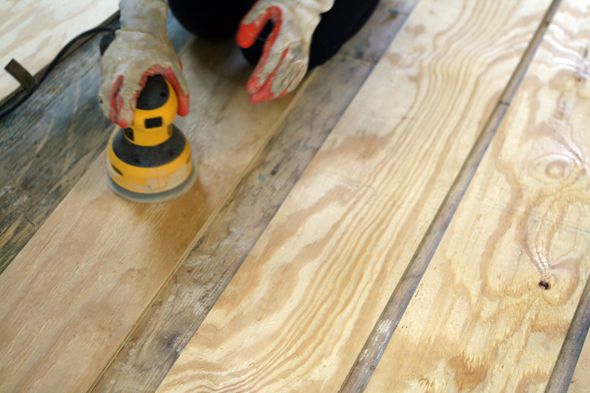
Once we had all the carpet removed and all the wood planks upstairs to the back porch, it was time to start the only tedious part of this project: all the sanding. It was actually pretty easy work, but it just took some time (actually about a minute and a half or two per plank, which really adds up). I asked Heather to sand while I was installing the planks, and usually the timing worked out well and we were able to keep a good pace.
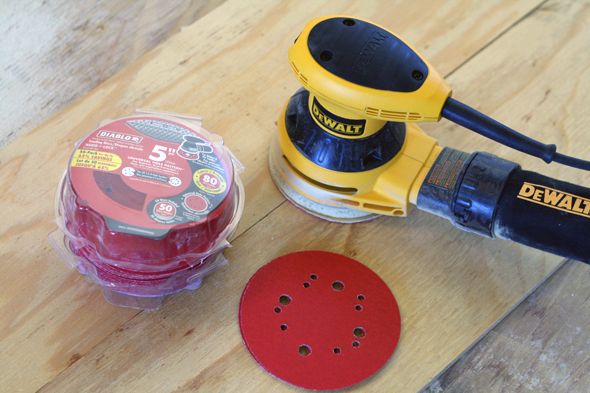
This new orbital sander has changed my LIFE. You guys, what have I been doing with my dorky little Mouse sander for all these years?! Orbital is where it's at. Worth every last penny.
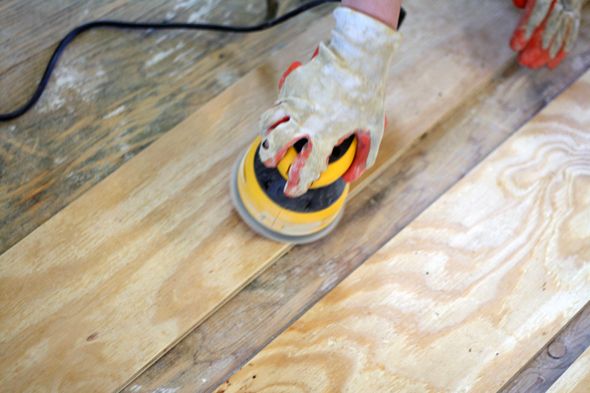
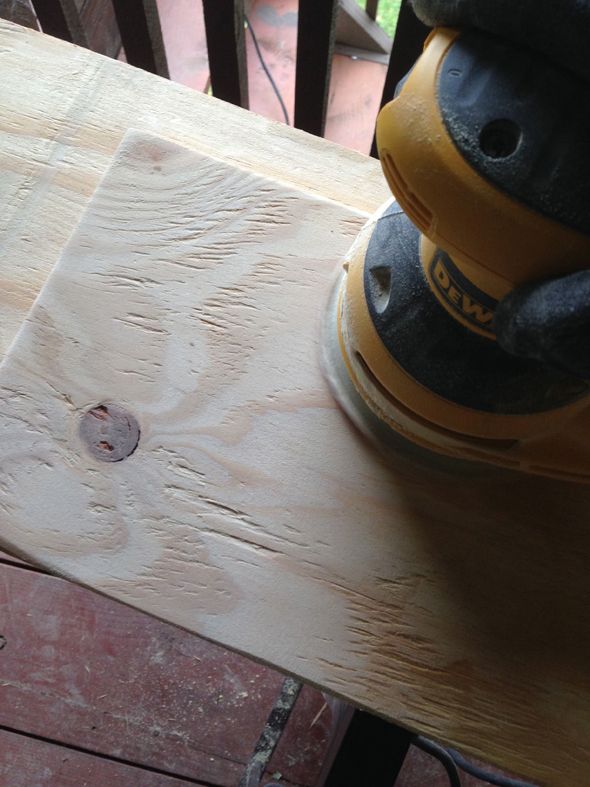
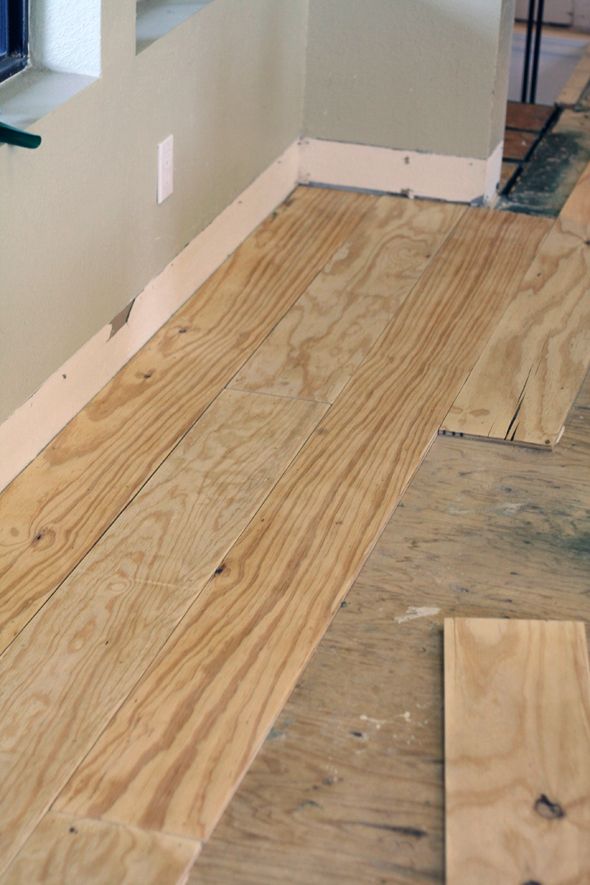
I bought a couple packages of the bulk 50-count course/removal sanding pads and they really worked fast on any rough parts or spray painted markings or splinters on the plywood planks. It worked out best to change the sanding pad every three or four planks. And I didn't worry about getting every imperfection off - you're just going for the obvious parts that look bad or like they could hurt a bare foot. We also sanded down the perimeter of every plank so that the edges were sort of beveled. I think this step made a huge difference in helping the planks look like they're not just cut down plywood pieces.
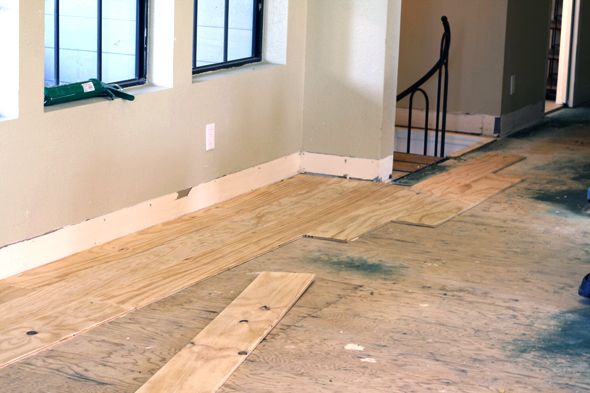
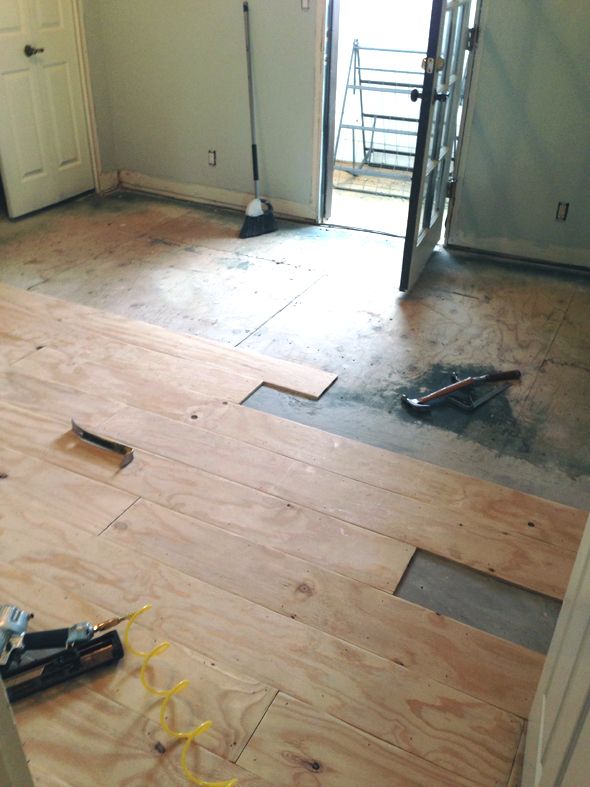
The installing part was so easy, especially when there weren't additional cuts needed. You'll want to start on the longest, straightest wall you have. Don't start on a wall that requires a lot of cuts and notching out - your lines will get messy and crooked really fast. If you start your installation on a long, straight wall and just focus on maintaining even spacing, the planks will look great. You can use a ruler or t-square to help with spacing, but I felt comfortable eyeing it.
To lay the wood down, I first squiggled on to the back side of the planks a line of Subfloor Liquid Nails (in the big contractor size, using the oversized caulking gun). I went through at least a dozen of these tubes of glue - you'll need a lot of it!


Plywood sheets are 4x8', which is 32 square feet. We needed to install about 800 square feet of flooring up in the studio space with the attached bedroom and balcony. Which meant we needed about 25 sheets of plywood. At less than $18 per sheet, my price per square foot came in at about 50 cents, which is complete insanity!
So, I found the plywood I wanted, took a photo of the price tag, and walked up to the customer service desk. I placed an order for 25 sheets and I asked for each sheet to be cut down into 8" planks, lengthwise (which meant there was no waste - exactly six planks from each sheet). I'll admit that I did get a few funny looks, but for the most part everyone at Home Depot was incredibly nice and accomodating, given the huge ask. I was more than prepared to pay 10 or even 25 cents per cut, like one of the guys in the lumber department suggested they might charge me at the order desk. I think I paid for cuts when I did the wall planking project in our mudroom, but this time there was no charge for all those cuts! I'm pretty sure it was because I was really flexible on timing and let them take as long as they wanted to get the order finished. And even then, it was less than 24 hours before they called to tell me my planks were ready to be picked up.
We borrowed a truck from my kind brother in law and he and the Home Depot guys helped us load up the 25 sheets of cut wood. The tricky part was then getting all the wood upstairs! These amazing gloves practically never left my hands during the two or so days I was installing the planks and moving them around. The gloves are thin, but really durable and they grip so well that you almost forget you're wearing gloves at all. They're my favorite brand I've used so far.
Once we had all the carpet removed and all the wood planks upstairs to the back porch, it was time to start the only tedious part of this project: all the sanding. It was actually pretty easy work, but it just took some time (actually about a minute and a half or two per plank, which really adds up). I asked Heather to sand while I was installing the planks, and usually the timing worked out well and we were able to keep a good pace.
This new orbital sander has changed my LIFE. You guys, what have I been doing with my dorky little Mouse sander for all these years?! Orbital is where it's at. Worth every last penny.
I bought a couple packages of the bulk 50-count course/removal sanding pads and they really worked fast on any rough parts or spray painted markings or splinters on the plywood planks. It worked out best to change the sanding pad every three or four planks. And I didn't worry about getting every imperfection off - you're just going for the obvious parts that look bad or like they could hurt a bare foot. We also sanded down the perimeter of every plank so that the edges were sort of beveled. I think this step made a huge difference in helping the planks look like they're not just cut down plywood pieces.
The installing part was so easy, especially when there weren't additional cuts needed. You'll want to start on the longest, straightest wall you have. Don't start on a wall that requires a lot of cuts and notching out - your lines will get messy and crooked really fast. If you start your installation on a long, straight wall and just focus on maintaining even spacing, the planks will look great. You can use a ruler or t-square to help with spacing, but I felt comfortable eyeing it.
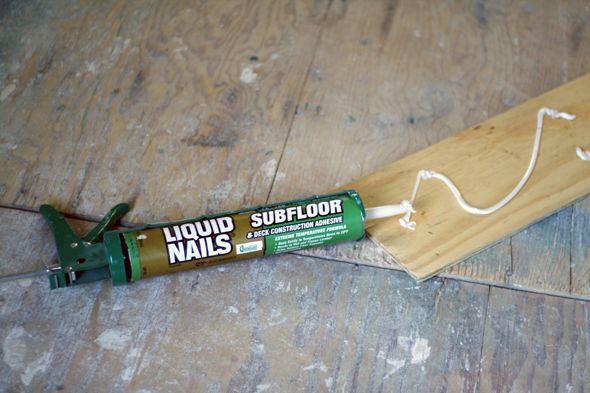
To lay the wood down, I first squiggled on to the back side of the planks a line of Subfloor Liquid Nails (in the big contractor size, using the oversized caulking gun). I went through at least a dozen of these tubes of glue - you'll need a lot of it!
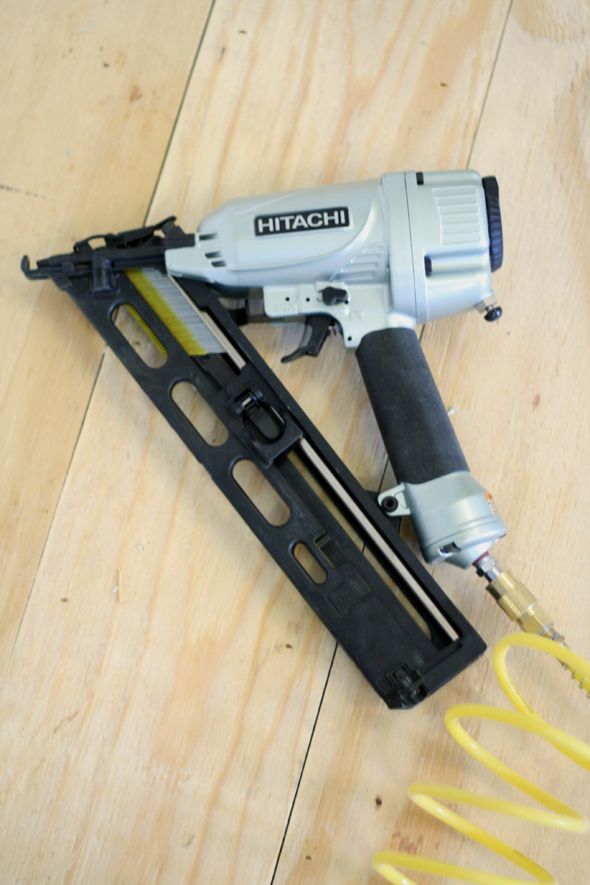
Then you place the plank down and step on it to help spread the glue before nailing it in place. I have this angled finish nailer (which is also great for installing moulding) and I really, really love it. I have a battery-operated brad gun too and there is just no comparison to the pneumatic nailers. It's so worth buying an air compressor, or even just renting one and a nailer for the day from Home Depot or Lowes.
I nailed a brad in every 8-10 inches along both sides of every plank. I didn't fill the nail holes either in the end to help the wood look more like old planks.
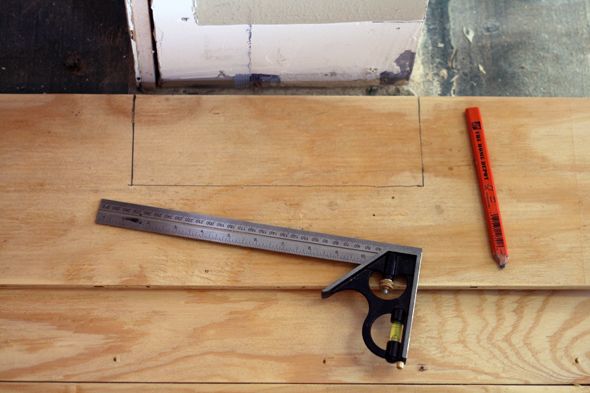
You'll want a couple of different saws on hand to help with the cutting. I found a miter saw was the easiest and most exact way to cut down the planks shorter. My saw isn't big enough to cut through a whole plank clean, so I had to cut and then flip the board and cut again. My saw has a laser though, so it was easy to line things up and get an exactly flush cut the second time. It goes faster than you'd guess.
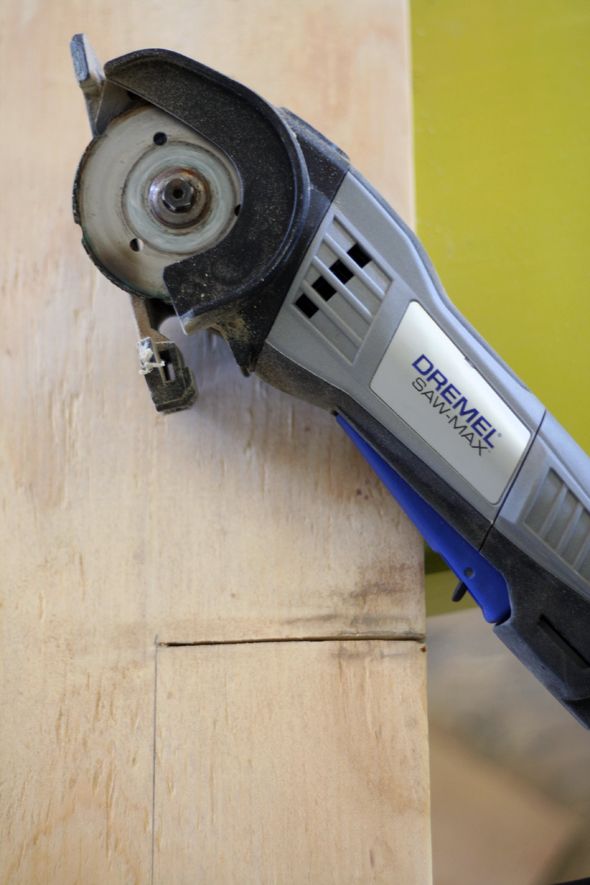
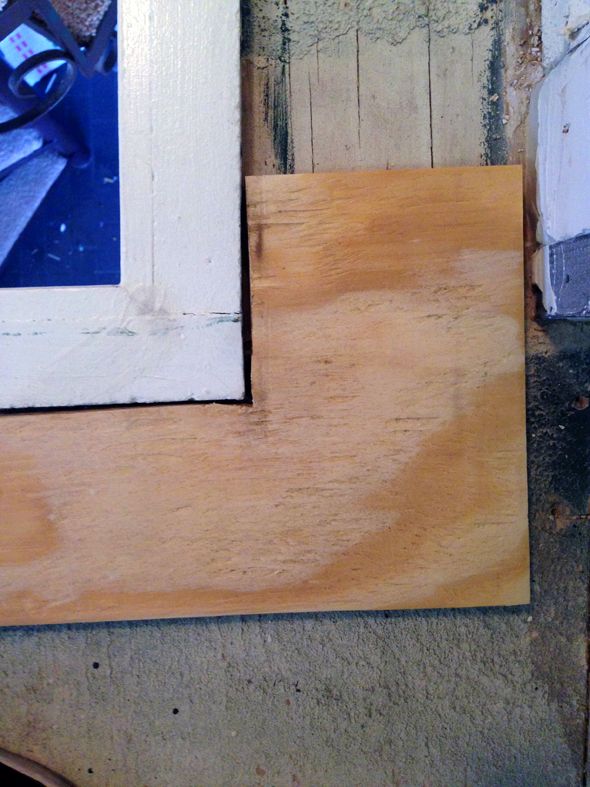
I love an excuse to use my Dremel Saw-Max and it worked SO well with this project. Any time I needed to notch out part of a plank, I could just zip around with this little guy.
If you don't have a Dremel, a regular old circular saw and a coping saw will work really well. I ended up using all of these saws at different points. The closets and our spiral stairs made for some tricky angles.
The floor went down really fast though, especially when we got past all the cuts and on to the straight laying. Just like with other flooring, you'll want to stagger the seams and throw in some shortened planks for every two or three full-length planks, just for variation.
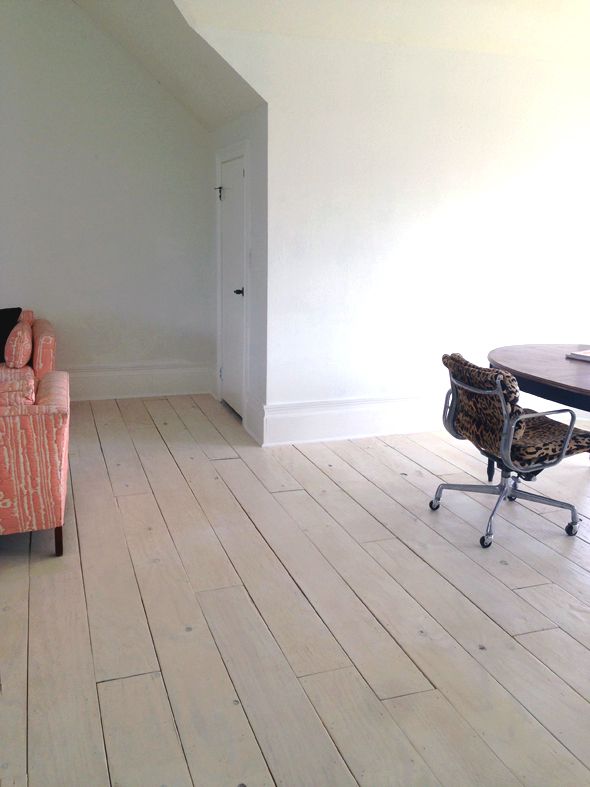
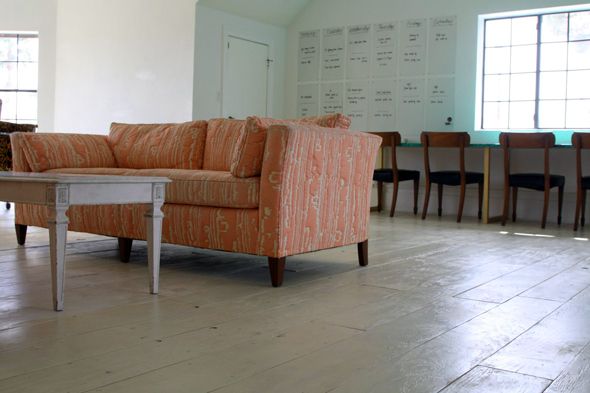
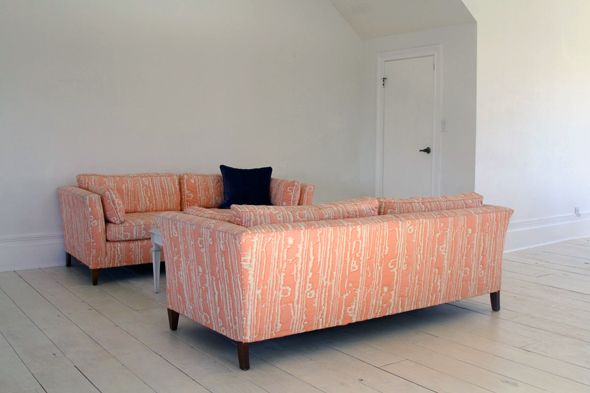
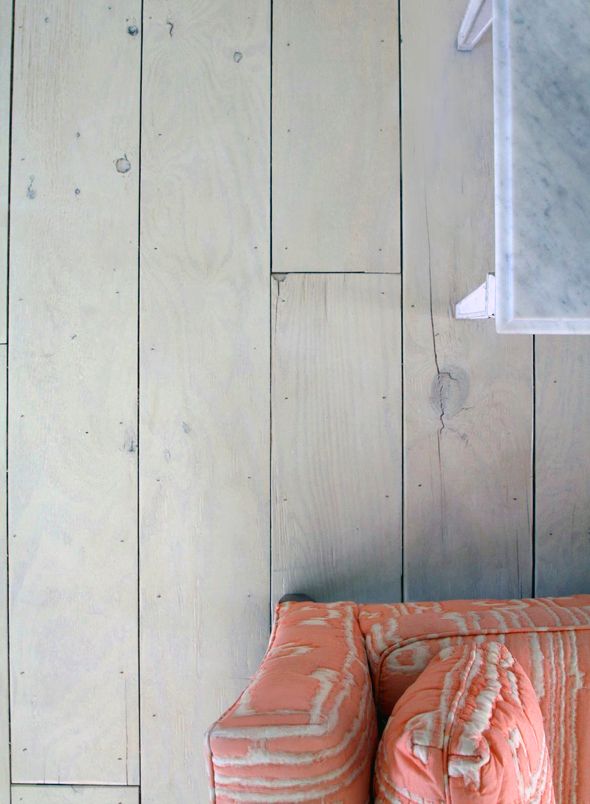
You'll find that not all the planks will be exactly 8" wide, which isn't a big deal if you are going for a sort of gappy look like I was. I shot for a gap of between 1/32" and 1/8", though there are some full 1/4" gaps in some places. I ended up really loving the variation there. It gives the floor a lot of character.
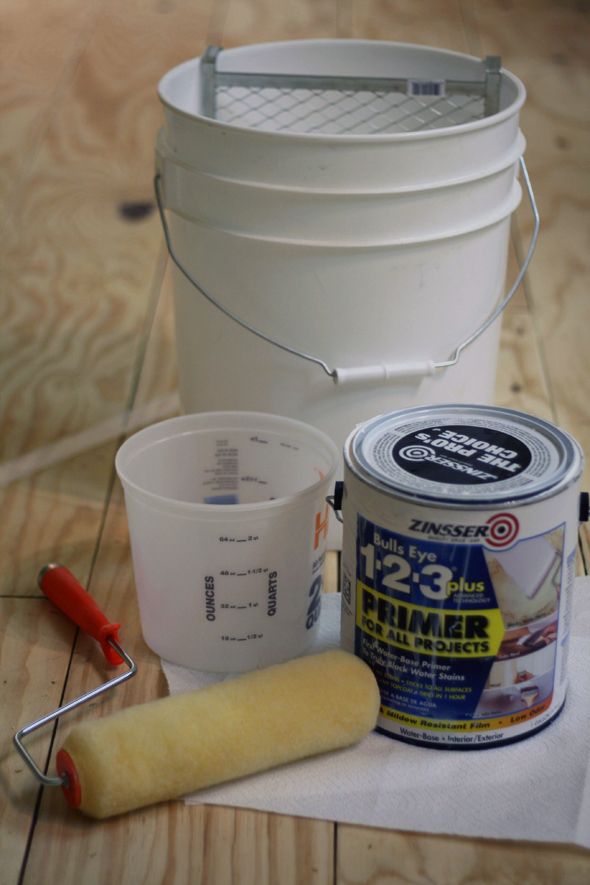
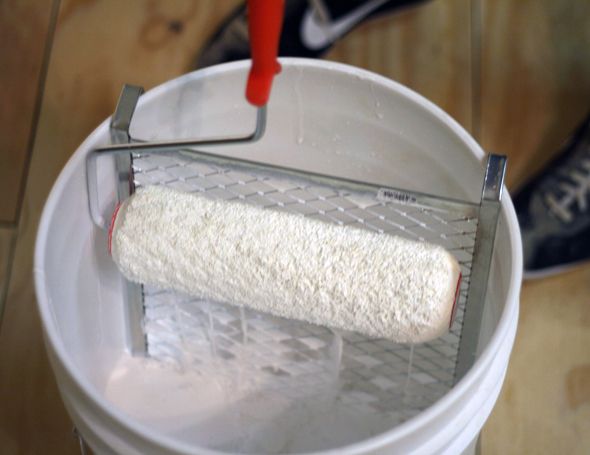
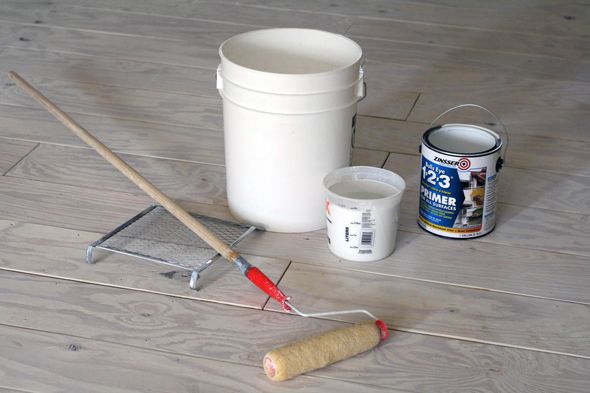
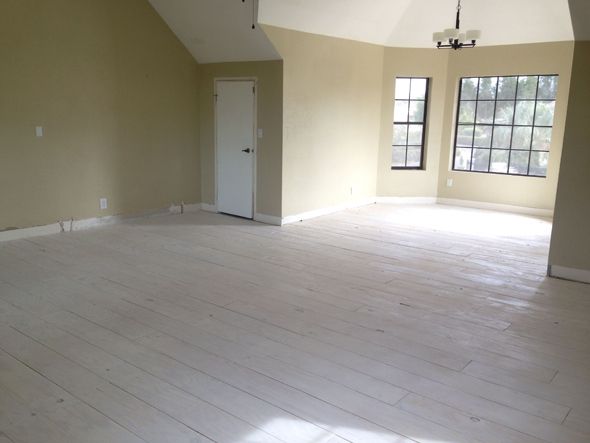
When the wood was all installed, I wanted to get everything painted and sealed asap, so the raw, freshly sanded plywood wouldn't get dingy. I painted a few sample planks and I decided I wanted to be able to see a lot of the graining and knots in the planks, so I went for a more white-washed look over an opaque, painted look. I mixed one part water-based primer with two parts water in a big bucket - and it was pretty watery, but I knew it would look right in the end. I used primer because I wanted a chalky, limed look underneath the sealer.
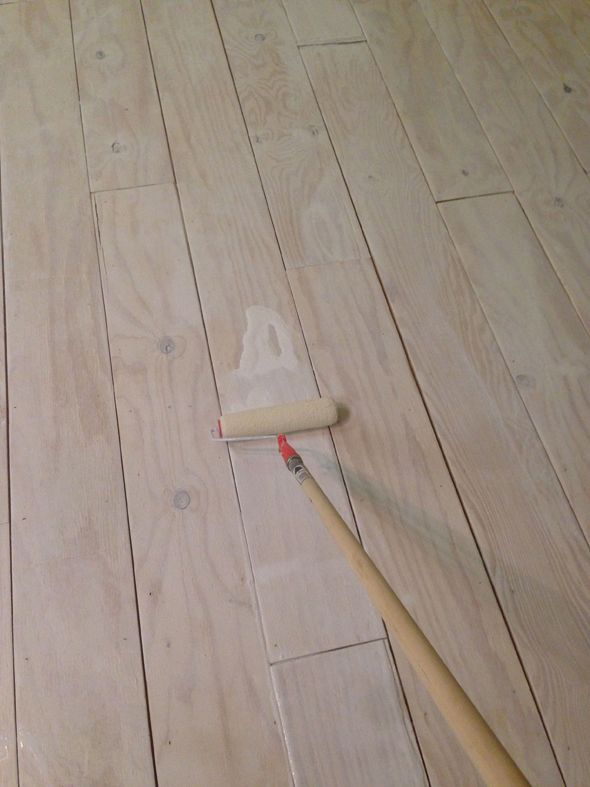
Heather and Ali and I rolled on the first coat together in about 15 minutes. Painting floors goes so fast for some reason! You can be really sloppy with this first coat, too, so that the paint drips down the sides of the planks.
The second coat smoothed out the color a lot. I tried to paint plank by plank to minimize roller marks (the roller was about the same width as the wood).
The extension poles make it a super fast and easy job.
This was just after rolling on the second coat of the primer mixture. It looked pretty pink to me, but I think a lot of that was the khaki wall color reflecting down.
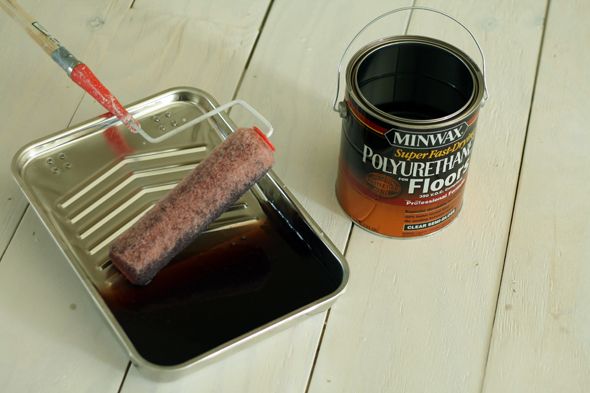
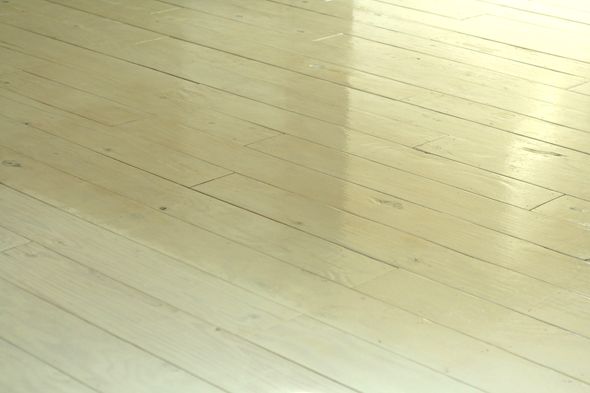
The poly I used to seal the planks ended up changing the color a little too, even though it said it was a clear formula. It has some brown to it, which I ended up actually really loving. It made the floors a really pretty, creamy ivory color with gray undertones.
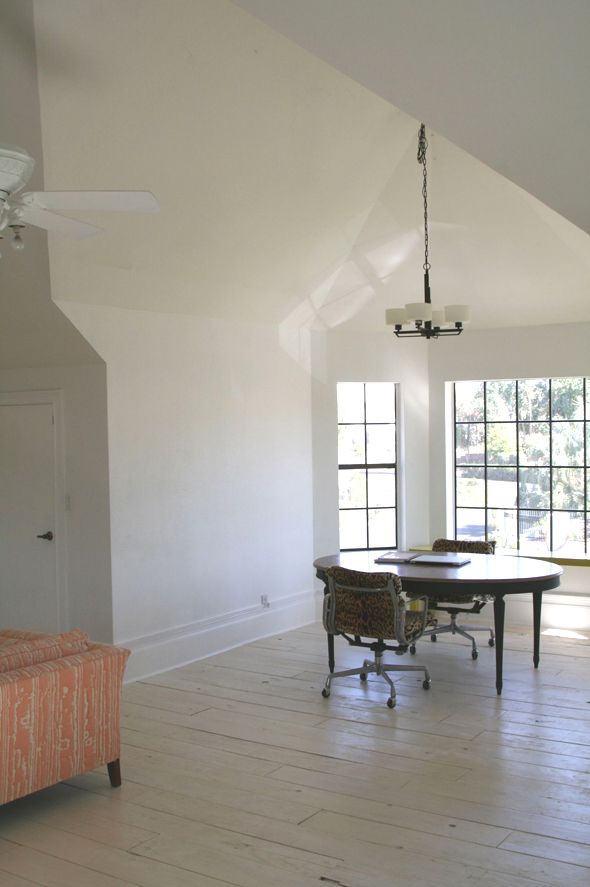
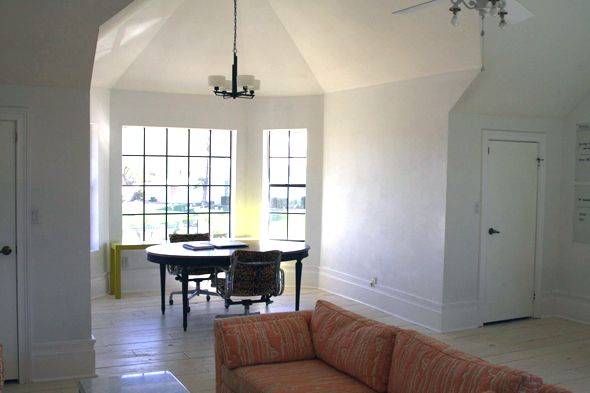
Once the walls were painted bright white, the more muted floor color was exactly perfect. I don't think a pure white would have been right for the floors in here. I love the tone-on-tone look so much more.
The semi-gloss sheen of the poly is really pretty and it's holding up really well so far. There are a few places I missed and need to touch up, but that's an easy fix.
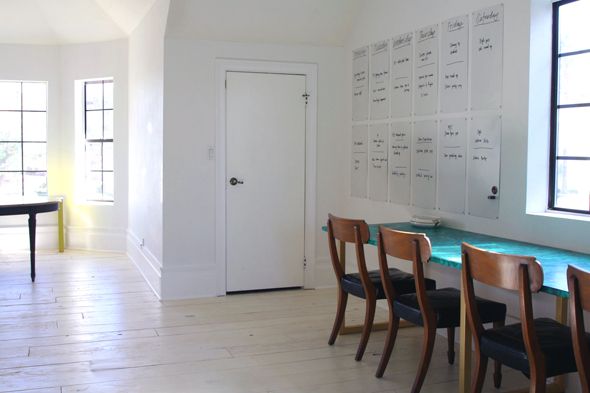
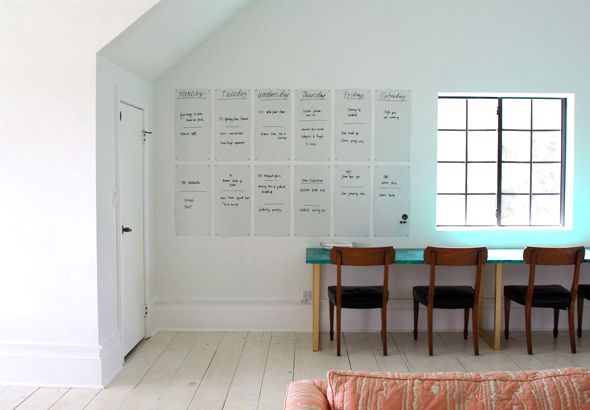
We haven't even started decorating in here yet, but I LOVE how bright the space feels now! Remember how dark it was just a few short weeks ago?
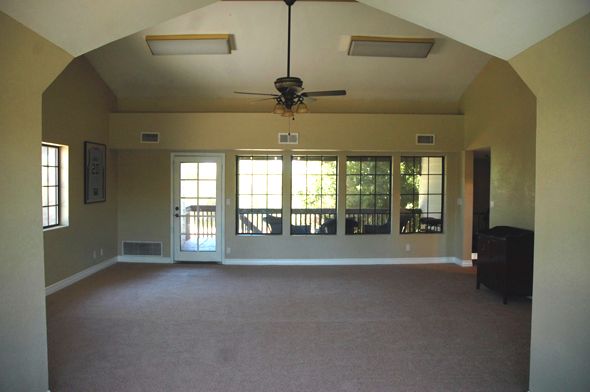
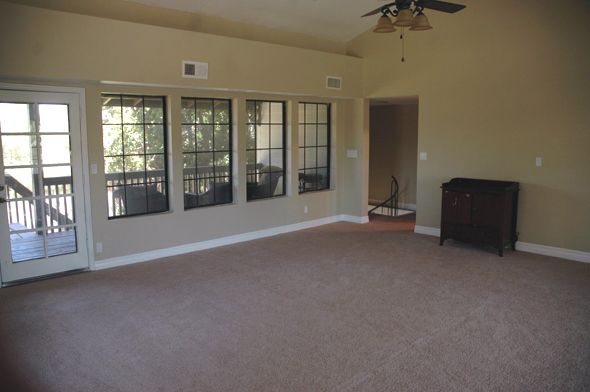
The floors have completely changed the way I feel about this space! Instant character!
And at only 50 cents a square foot for the plywood, it's hard to find things to complain about. It's a great look, especially for the price.

The studio is becoming a really lovely place to get work done and I know it will be perfect for photographing projects for the blog and book. We get great light in here all hours of the day and all the shades of white make the room just glow. :)
Now, on to the decorating!
0 comments :
Post a Comment